How to Use Insurance After Storm Damage: The Only Checklist You’ll Ever Need (2025)
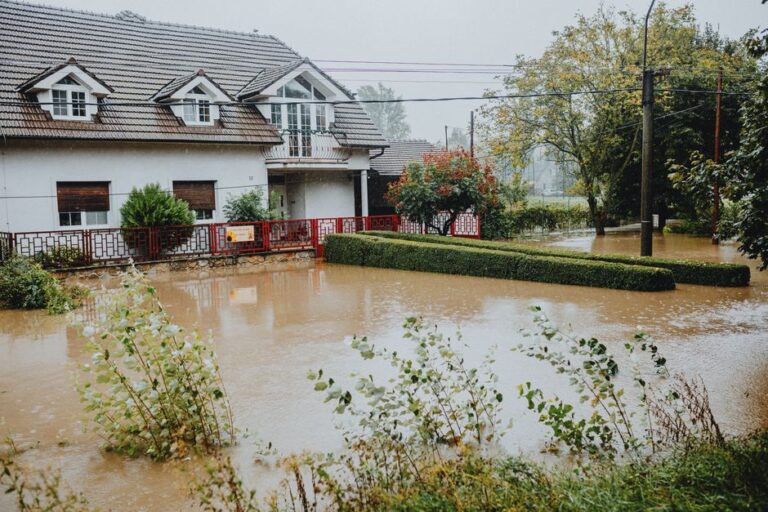
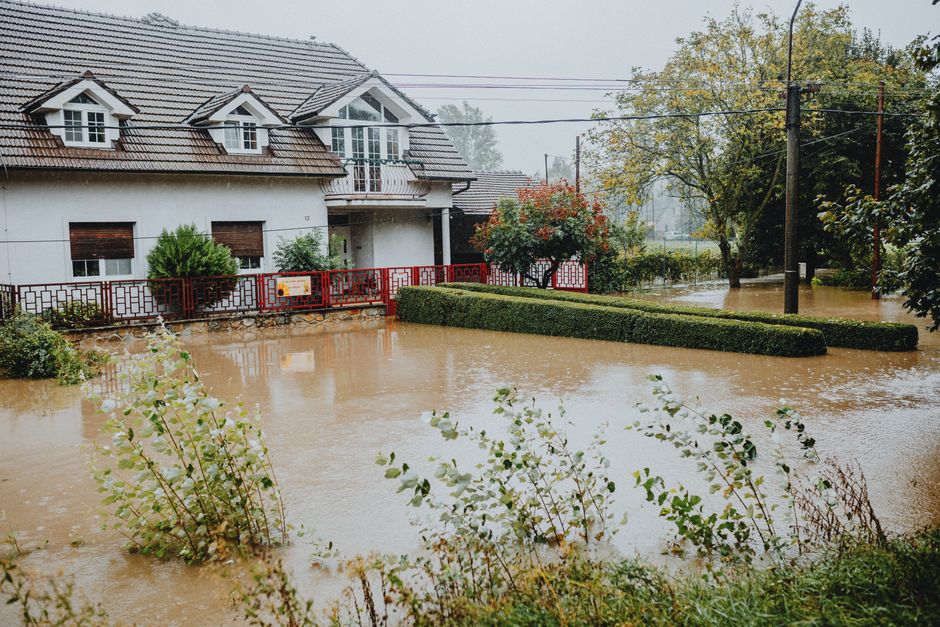
You survived the storm. Your house didn’t.
Shingles torn off. Water pouring through the ceiling. A tree through the roof. You’re standing in the wreckage in your socks, heart pounding, wondering: “Now what? How do I even start with insurance?”
Here’s the uncomfortable truth most people discover too late: the #1 reason storm damage claims get delayed, reduced, or denied is not the storm—it’s what you do in the first 48 hours. Miss one step, skip one photo, or say the wrong thing on the phone, and you could leave thousands of dollars on the table.
This isn’t a generic “call your insurer” article. This is a field‑tested, step‑by‑step checklist to help you:
- Protect your home and family immediately
- Document damage like a pro so your claim is harder to deny
- Avoid the most expensive mistakes homeowners make
- Maximize your insurance payout without “lying” or “cheating”
- Deal with adjusters, contractors, and even denied claims
Read this all the way through once, then come back and use it as your storm damage insurance checklist while you’re still in crisis mode.
The Night a Tornado Changed How I Think About Insurance
In 2023, a small town in the Midwest got hit by a surprise tornado. One homeowner, “Mark,” told me his story.
Mark’s house took a direct hit. Half the roof was gone, windows shattered, drywall soaked. He did what most people do: he called his insurance company the next morning and said, “My house got destroyed in the storm.”
Here’s where it went wrong.
He cleaned up immediately. He threw away the broken furniture, torn shingles, and water‑soaked carpet. He didn’t take videos. He didn’t write down a timeline. When the adjuster came, there was “not enough evidence” of the original damage. His claim was initially cut by 40%.
After weeks of back‑and‑forth, hiring a public adjuster, and pulling security camera footage from his doorbell cam, he finally got a better settlement—but it took 5 months and thousands in extra costs.
He told me: “If I had a checklist like this, I would’ve saved months of stress and probably $15,000–$20,000.”
This guide is the checklist he wishes he had.
Why Most Storm Damage Claims Fail (And How to Make Sure Yours Doesn’t)
Storm damage claims are not like fender benders. They’re messy, emotional, and complicated. According to a 2024 Insurance Information Institute analysis:
- About 1 in 5 homeowners reports being “very unsatisfied” with how their storm claim was handled.
- Over 60% of disputed claims involve disagreements over the cause of damage (wind vs. water vs. pre‑existing issues).
- Only 14% of policyholders say they fully understand what their home insurance covers for storms.
That last stat is the killer: most people don’t know what they’re actually insured for.
Here’s the controversial truth: insurance companies are not evil, but they are profit‑driven. Their adjusters are trained to pay as little as the policy allows. Your job is not to “trick” them—it’s to prove your loss clearly, follow the process, and insist on what you’re owed.
“Policyholders who document damage thoroughly in the first 48 hours are up to 3x more likely to receive a fair initial offer.”
— Dr. Jane Simmons, insurance policy analyst and former claims trainer
That’s why this checklist is built around speed + documentation + strategy.
Step 1: Protect Life First, Property Second (But Fast)
Before you think about insurance, think about safety.
Immediate Safety Checklist
- Evacuate if the structure is unsafe (obvious, but panic makes people do dumb things).
- Stay away from downed power lines and standing water near them.
- Do not enter a severely damaged roof or ceiling area—risk of collapse.
- Call 911 if there’s any immediate danger (fire, gas leaks, injuries).
- Keep children and pets away from debris (nails, glass, sharp metal).
Once everyone is safe, you have a narrow window to protect your property and your claim.
Key Action Right Now
- Take a breath. Seriously. Panic causes mistakes.
- Grab your phone. You’re about to become a documentary filmmaker.
- Do not make permanent repairs yet—only temporary ones to prevent more damage.
Step 2: Know What Your Policy Actually Covers (Before You Call)
Here’s where people blow it: they call their insurer and just say, “Storm damage,” without knowing the exact terms of their coverage.
Common Storm‑Related Coverages
| Coverage Type | What It Usually Covers | Common Limits / Gotchas |
|---|---|---|
| Dwelling Coverage | Structure of your home (roof, walls, floors, attached structures) | May exclude wear and tear; older roofs may get “actual cash value” not replacement |
| Other Structures | Detached garage, shed, fence, mailbox | Often a % of dwelling coverage (e.g., 10%) |
| Personal Property | Furniture, electronics, clothing, appliances | Some items (jewelry, art) may need extra riders |
| Additional Living Expenses (ALE) | Hotel, rent, meals, storage if you can’t live at home | Usually capped at 20–30% of dwelling coverage; keep receipts |
| Windstorm / Hail | Wind and hail damage to structure and sometimes contents | In some coastal areas, separate deductible (e.g., 1–5% of home value) |
| Flood | Water damage from rising water, storm surge, overflowing rivers | Usually NOT in standard home insurance; needs separate flood policy |
You can do this now:
- Log into your insurer’s website or app and download your policy declarations page.
- Look for: dwelling coverage, deductibles, exclusions, and any “windstorm” or “hurricane” deductible.
- If you can’t find it, call and say: “Can you email me my declarations page and a summary of my storm‑related coverages?”
Step 3: Document Everything Like Your Claim Depends on It (Because It Does)
This is where Mark lost big. He cleaned up too fast and didn’t document enough.
Storm Damage Documentation Checklist
- Take wide‑angle photos of every affected area from multiple angles.
- Take close‑up photos of specific damage (holes, cracks, water stains, dents).
- Record video walking through the house, narrating what happened and what you see.
- Photograph serial numbers and labels on damaged appliances and electronics.
- Save weather reports for your area (screenshots of radar, NWS alerts, news articles).
- Keep damaged items until the adjuster sees them or says you can dispose of them.
- Do NOT throw away soaked drywall, insulation, or flooring until properly documented.
Pro tip: Upload everything to a cloud folder (Google Drive, Dropbox, iCloud) with a clear structure:
- Folder: “Storm Claim – [Date]”
- Subfolders: “Exterior,” “Roof,” “Living Room,” “Bedrooms,” “Personal Property,” “Receipts”
This is your evidence vault. If there’s ever a dispute, you’ll be glad you have it.
Step 4: Mitigate Further Damage (Without Hurting Your Claim)
Your policy almost certainly requires you to take reasonable steps to prevent additional damage. That’s called “mitigation.”
Safe, Claim‑Friendly Mitigation Steps
- Put tarps over holes in the roof or broken windows.
- Board up broken windows with plywood.
- Extract standing water if safe (wet vac, mop, pump).
- Use fans and dehumidifiers to start drying out the house.
- Move undamaged items to a dry area or storage unit.
- Turn off electricity in flooded areas if you can do so safely.
Important: Keep every receipt—tarps, plywood, fans, hotel stays, meals, storage, even gas to drive to a hotel. These often fall under Additional Living Expenses (ALE) or are reimbursable as part of your claim.
Step 5: Call Your Insurance Company (And Say the Right Things)
This is where nerves kick in. You’re tired, stressed, and the last thing you want is a scripted phone call. But what you say matters.
What to Say on the First Call
- Be factual, not emotional. Don’t guess or exaggerate.
- Say: “I’m reporting storm damage that occurred on [date] due to [storm type, e.g., tornado/hurricane/severe thunderstorm].”
- Describe the types of damage: roof, windows, water intrusion, fallen trees.
- Mention: “I’ve taken temporary measures to prevent further damage and have documented with photos and video.”
- Ask for:
- Your claim number
- The name and contact of your claims adjuster
- Any forms or documents they need from you
- Timeline for inspection
What NOT to Say
- Don’t say: “My house is destroyed” if it’s not. Use specific, accurate descriptions.
- Don’t guess about the cause if you’re not sure. Say: “I believe it was wind/hail; I’m not certain.”
- Don’t admit fault or say things like “I should have maintained the roof better.”
“The most common mistake homeowners make is talking too much on the first call. Stick to facts, not theories.”
— Michael Ramirez, licensed public adjuster and storm claims consultant
Step 6: Understand Your Deductibles (Especially Wind and Hurricane Ones)
This is the part that shocks people.
Many policies have a special deductible for windstorms or hurricanes, often expressed as a percentage of your home’s insured value, not a flat $1,000.
Example: How a Percentage Deductible Works
| Home Insured Value | Wind/Hurricane Deductible | Deductible Amount |
|---|---|---|
| $200,000 | 2% | $4,000 |
| $350,000 | 3% | $10,500 |
| $500,000 | 5% | $25,000 |
That means if your home is insured for $350,000 and your wind deductible is 3%, you pay the first $10,500 out of pocket before insurance kicks in.
You can do this now:
- Check your declarations page for any “wind,” “hurricane,” “named storm,” or “storm” deductible.
- If it’s a percentage, calculate what that means in dollars.
- Factor that into your expectations for the payout.
Step 7: Meet the Adjuster Without Getting Played
The insurance adjuster is not your enemy, but they’re not your best friend either. They represent the company.
How to Handle the Adjuster Visit
- Be present during the inspection if at all possible.
- Walk with them and point out all damage you’ve documented.
- Show your photos and videos and give them copies.
- Don’t sign anything on the spot unless you fully understand it.
- Take notes on everything they say and do.
- Be polite but firm. You’re not begging; you’re enforcing a contract.
If you feel overwhelmed, you have the right to hire a public adjuster to represent you. They typically charge a percentage of your claim (often around 10–15%), but in complex or large claims, they can be worth it.
Step 8: Get Your Own Repair Estimates (Don’t Rely Only on the Insurer’s)
Insurance companies often use software and preferred contractors that may undervalue repairs.
Smart Estimating Strategy
- Get at least 2–3 written estimates from reputable local contractors.
- Make sure estimates are detailed (line items for materials, labor, permits).
- Ask contractors to highlight code upgrades required by your local building department.
- Provide these estimates to your adjuster and ask how they compare to the insurer’s estimate.
You can do this now:
- Search for “storm damage roof repair [your city]” or “water damage restoration [your city].”
- Look for companies with strong reviews and proper licensing and insurance.
- Tell them you’re working on an insurance claim and need a detailed written estimate.
Step 9: Don’t Accept the First Offer If It’s Clearly Too Low
Here’s the counter‑intuitive truth: the first offer is often not the final offer.
Insurance companies know that many people will take the first check just to be done with the process. You don’t have to.
When to Push Back
- If the estimate misses obvious damage you documented.
- If the pricing is below local market rates for labor and materials.
- If they’re using cheaper materials than what you had (e.g., basic shingles vs. architectural shingles).
- If they’re not including code upgrade costs required by your city or county.
How to push back:
- Write a clear, factual letter (or email) explaining what’s missing.
- Attach your photos, videos, and contractor estimates.
- Ask for a re‑inspection or a review by a senior adjuster.
- If needed, mention you’re considering hiring a public adjuster or consulting an attorney.
Step 10: Deal With Special Situations (Flood, Denials, and Partial Damage)
Not all storm damage is straightforward.
Wind vs. Water: The Great Insurance Battle
One of the biggest fights after major storms is whether damage was caused by:
- Wind (often covered by your homeowner’s policy)
- Flood or storm surge (usually not covered unless you have a separate flood policy)
Example: A hurricane blows off your roof, and then rain pours in.
- Wind damage (roof missing) = typically covered.
- Water damage (soaked walls, floors, furniture) = may be covered if it entered through the wind‑created opening; insurers sometimes argue it’s “flood” or “water intrusion” and try to limit coverage.
What to do:
- Document the sequence: wind first, then water.
- Take photos of the missing roof or broken windows before the water damage spreads.
- If you have flood insurance, file both a homeowner’s claim and a flood claim.
If Your Claim Is Denied
Don’t panic. Denials can often be reversed.
- Ask for the specific reason in writing and the policy language they’re relying on.
- Review your policy and your evidence.
- Consider hiring a public adjuster or an insurance attorney.
- File a complaint with your state insurance department if you believe the denial is unfair.
Storm Damage Insurance Checklist: Print‑Friendly Summary
Here’s a condensed version you can print or save on your phone.
| Timeframe | Action | Why It Matters |
|---|---|---|
| Immediately | Ensure everyone’s safety; stay away from hazards | Protects life first |
| First 24–48 hours | Document damage with photos, video, and notes | Creates strong evidence for your claim |
| First 48 hours | Mitigate further damage (tarps, boarding up, water extraction) | Policy requirement; prevents extra loss |
| Within a few days | Review your policy and declarations page | You need to know your coverages and deductibles |
| Within a few days | Call insurer and report the claim | Starts the official process; gets you a claim number |
| Before cleanup | Keep damaged items until documented or approved for disposal | Prevents “no evidence” denials |
| During adjuster visit | Be present, show documentation, take notes | Ensures nothing is missed or downplayed |
| After inspection | Get your own repair estimates from contractors | Gives you leverage to challenge lowball offers |
| After first offer | Compare to estimates; push back if too low | You’re not obligated to accept the first number |
| Ongoing | Keep all receipts for temporary repairs, ALE, storage | May be reimbursable under your policy |
5 Costly Mistakes That Can Shrink Your Storm Damage Payout
These are the traps that cost homeowners the most.
1. Cleaning Up Too Fast
It’s natural to want your house back to normal. But if you throw away the evidence before it’s documented, you’re making the adjuster’s job harder—and giving them a reason to question you.
Fix: Document first, clean up second (except for safety and mitigation).
2. Not Understanding Your Deductibles
People are shocked when they learn they have to pay $10,000+ out of pocket before insurance pays.
Fix: Check your declarations page now and calculate your real‑world deductible.
3. Accepting the First Check
The first offer is a starting point, not a final verdict.
Fix: Compare to contractor estimates and negotiate calmly, in writing.
4. Failing to Mitigate Damage
If you leave a hole in the roof uncovered and more rain comes in, the insurer may deny the additional damage.
Fix: Make reasonable temporary repairs and keep receipts.
5. Not Keeping a Paper Trail
“He said, she said” doesn’t hold up. Emails, texts, and written letters do.
Fix: Communicate key points in writing. Follow up phone calls with an email summary.
How to Use Insurance After Storm Damage If You’re Renting
If you don’t own the home, you still have options.
- Renter’s insurance covers your personal property and sometimes ALE.
- The landlord’s insurance covers the structure, not your stuff.
- Document your belongings just like a homeowner would.
- File a claim under your renter’s policy for damaged or destroyed items.
- Keep receipts for temporary housing and extra food costs if you’re displaced.
What If You Don’t Have Flood Insurance But You Have Flood Damage?
This is one of the most painful situations.
Standard home insurance usually does not cover flooding. If you don’t have a separate flood policy:
- You may still qualify for government disaster assistance (FEMA, SBA loans).
- Apply as soon as a disaster is declared in your area.
- Contact your state’s emergency management agency for local programs.
- Talk to a nonprofit disaster recovery group; some help with repairs and temporary housing.
It’s not ideal, but it’s better than doing nothing.
Emotional Survival: Dealing With the Stress of Storm Damage
Let’s be real: this isn’t just about money. It’s about your home, your memories, your sense of safety.
- It’s normal to feel overwhelmed, angry, or numb.
- Break the process into small steps—like the checklist above.
- Ask for help: friends, family, neighbors, local churches, community groups.
- Talk to your doctor or a counselor if anxiety or sleep issues get bad.
- Remind yourself: this is temporary. You’re taking control by following a plan.
FAQ
How soon should I call my insurance company after storm damage?
You should call as soon as everyone is safe and you’ve taken basic steps to document damage and prevent further loss. Many policies require “prompt” notice, and delays can be used against you. In practice, within a few days is ideal, but sooner is better.
Does home insurance cover all storm damage?
No. Most policies cover wind, hail, and damage from storms, but they often exclude flooding and storm surge unless you have a separate flood policy. Earthquake is also usually separate. Always check your specific policy.
What is a hurricane or windstorm deductible?
It’s a special deductible that applies when damage is caused by a named storm, hurricane, or wind event. It’s often a percentage of your home’s insured value (for example, 2–5%), which can be thousands of dollars.
Can I choose my own contractor for storm damage repairs?
In most cases, yes. You usually have the right to choose your own licensed, reputable contractor. Some insurers push “preferred” vendors, but you’re not required to use them unless your policy explicitly says so (which is rare).
What if my storm damage claim is denied?
Ask for the denial reason in writing and the exact policy language. Review your documentation and consider hiring a public adjuster or attorney. You can also file a complaint with your state insurance regulator.
How can I maximize my storm damage insurance payout?
Thorough documentation, understanding your policy, getting independent contractor estimates, and being willing to negotiate instead of accepting the first offer are the most effective ways to maximize your payout.
Is renter’s insurance useful after storm damage?
Yes. Renter’s insurance can cover your personal belongings and additional living expenses if your rental becomes uninhabitable due to a covered storm event. It does not cover the building structure—that’s the landlord’s responsibility.
Your Next Move: Turn This Checklist Into Action
You don’t need to do everything at once. You just need to start.
Right now, pick one of these actions:
- Find your declarations page and check your storm‑related coverages and deductibles.
- If you’ve already had storm damage, start a cloud folder and upload all your photos, videos, receipts, and notes.
- If you’re safe but not damaged yet, save this checklist so you can find it fast when you need it.
Storms are getting more frequent and more intense. The question isn’t if you’ll face damage, but when. And when that day comes, the difference between a smooth claim and a nightmare often comes down to what you do in the first 48 hours.
If this checklist helps you—or could help someone you know—share it now on your favorite platform, tag a friend who owns a home, or send it to your family group chat. You might be the reason someone else doesn’t lose thousands of dollars after the next storm.